Invoicing in AnyHow
The ability to quickly create an invoice is one of the most useful features of AnyHow. However, there are a few ways this can be done and we will describe these here.
Quick Invoice
The Quick Invoice tool is probably the fastest way to create and submit invoices within the AnyHow system. It's highly customizable and our recommended way of generating invoices.
To access the tool do the following:
- Click into the manage section.
- On the left menu find "Tools"
- Click "Quick Invoice" in the tools section
Here you can use date filters (custom or pre-configured filters) to find approved time that has yet to be invoiced.
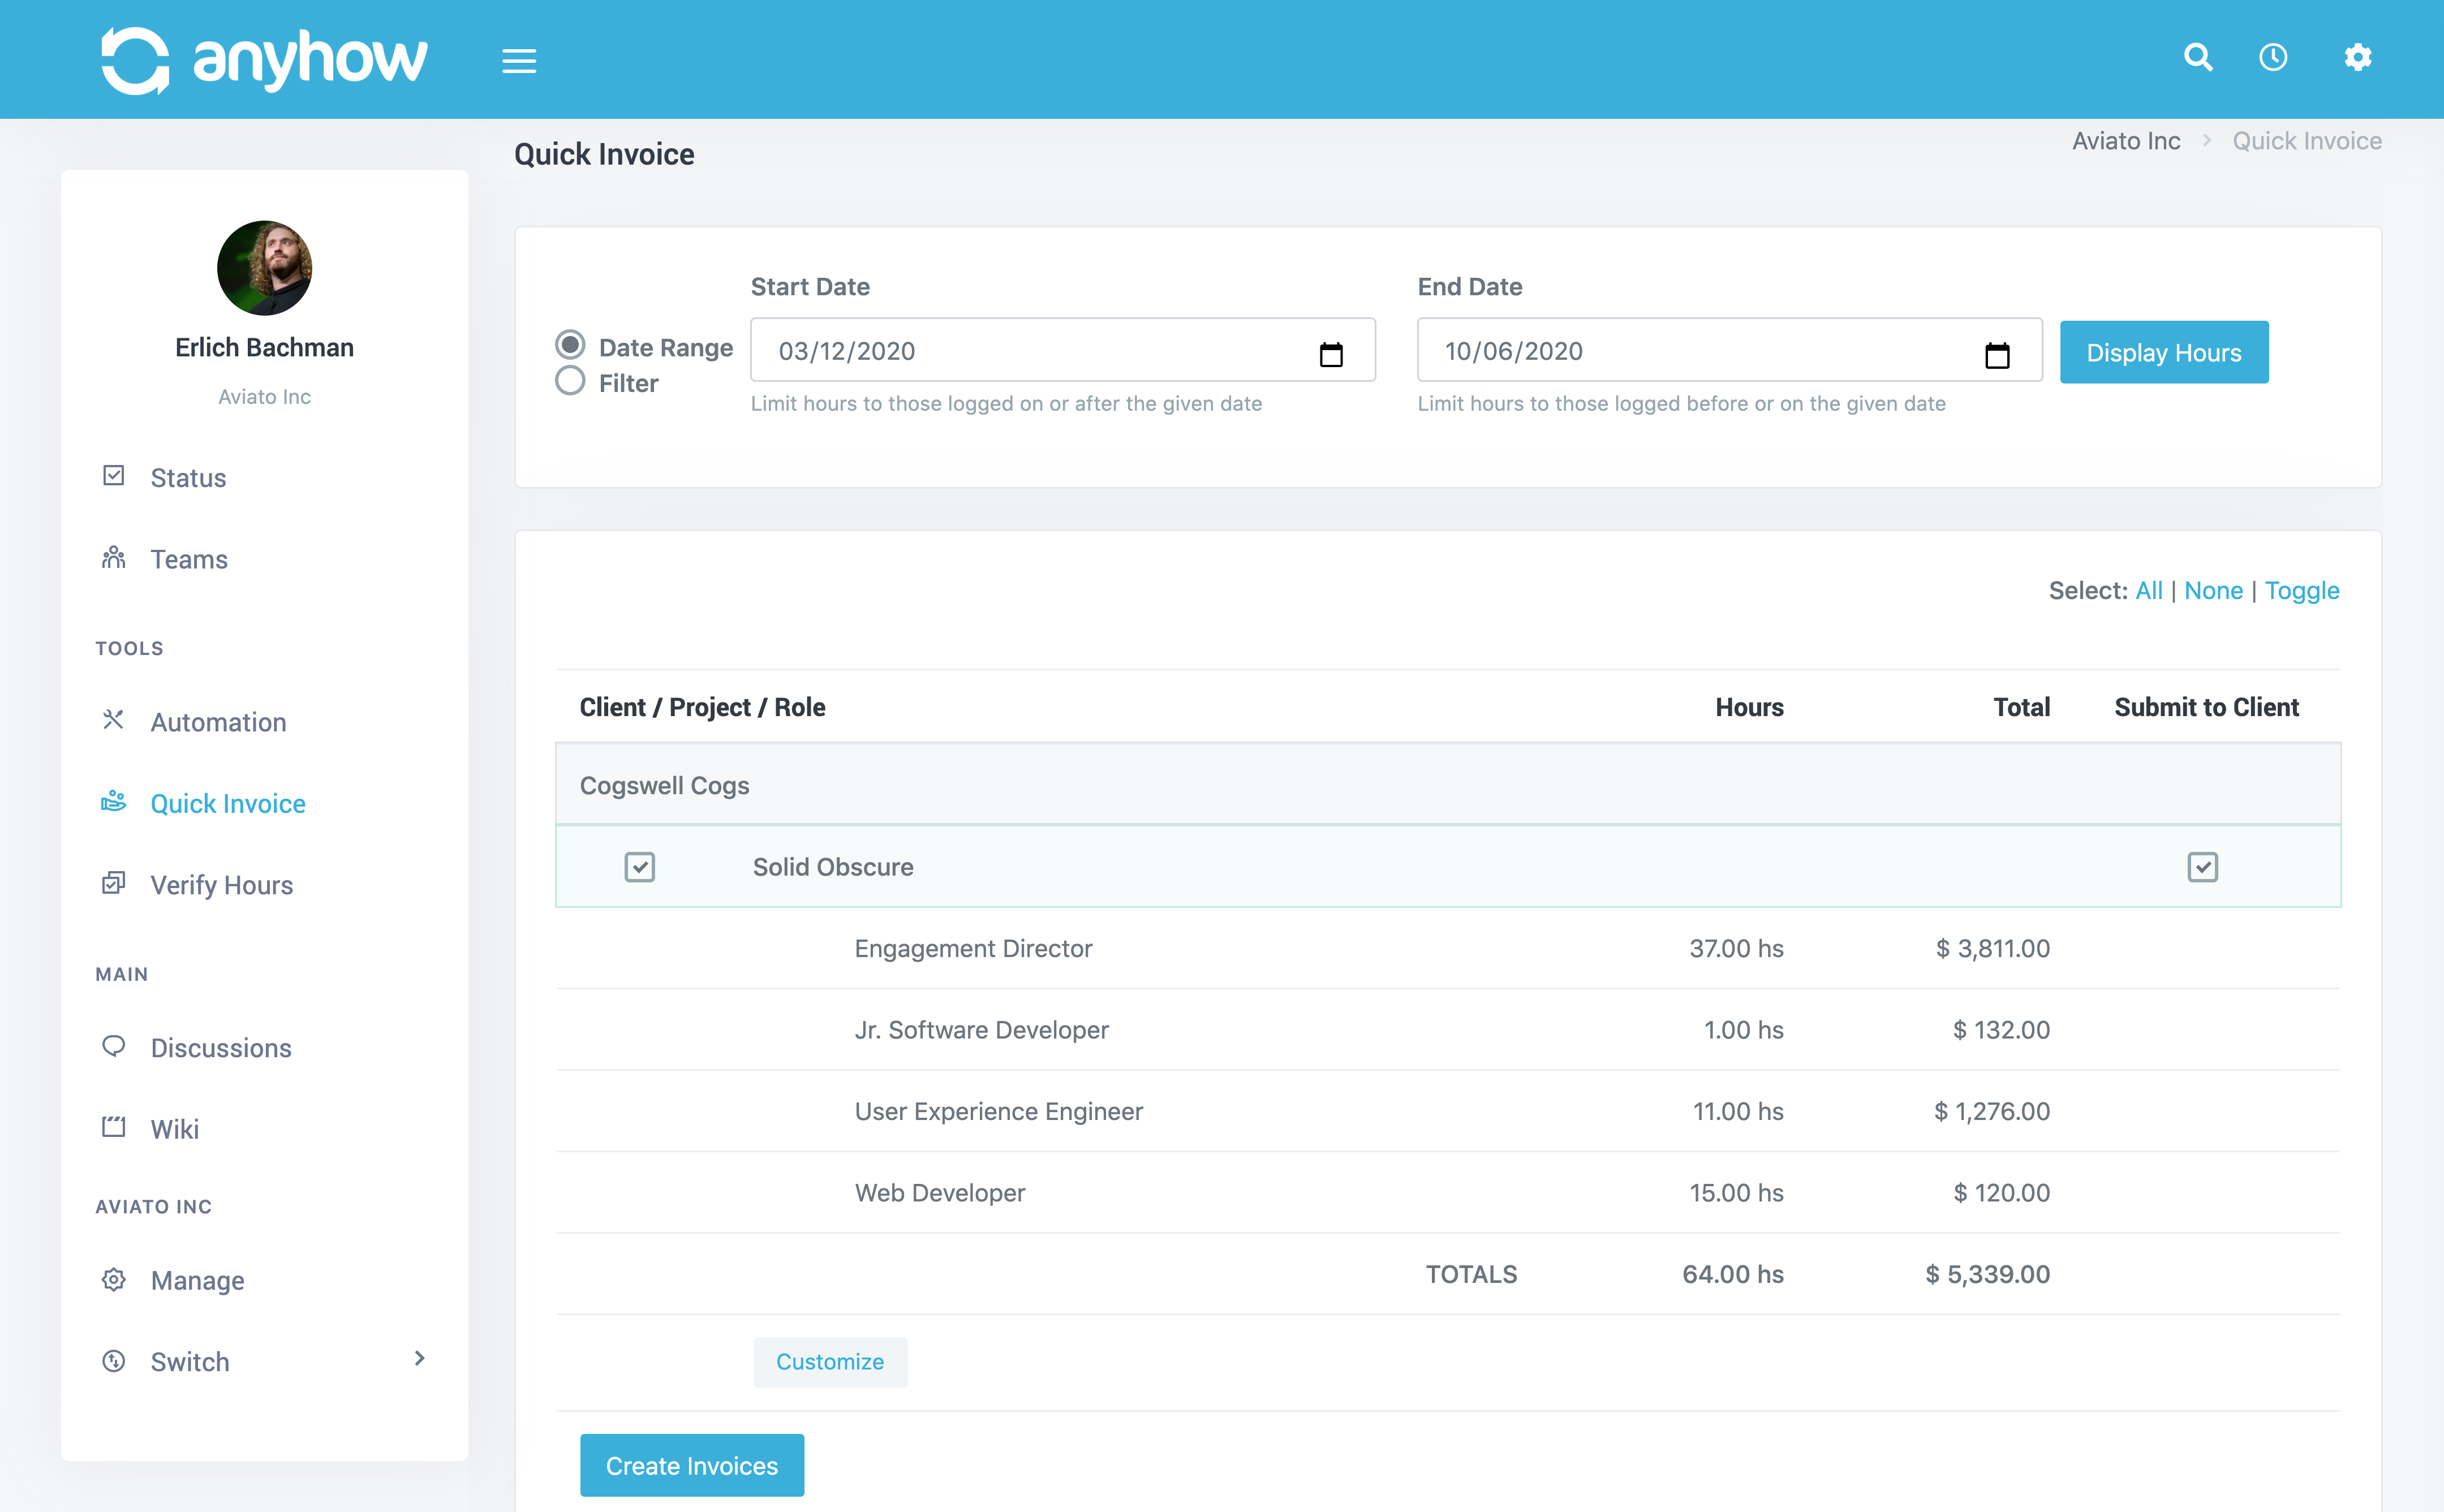
To be sure all approved time is included you should make sure there are no pending timesheet approvals before hand.
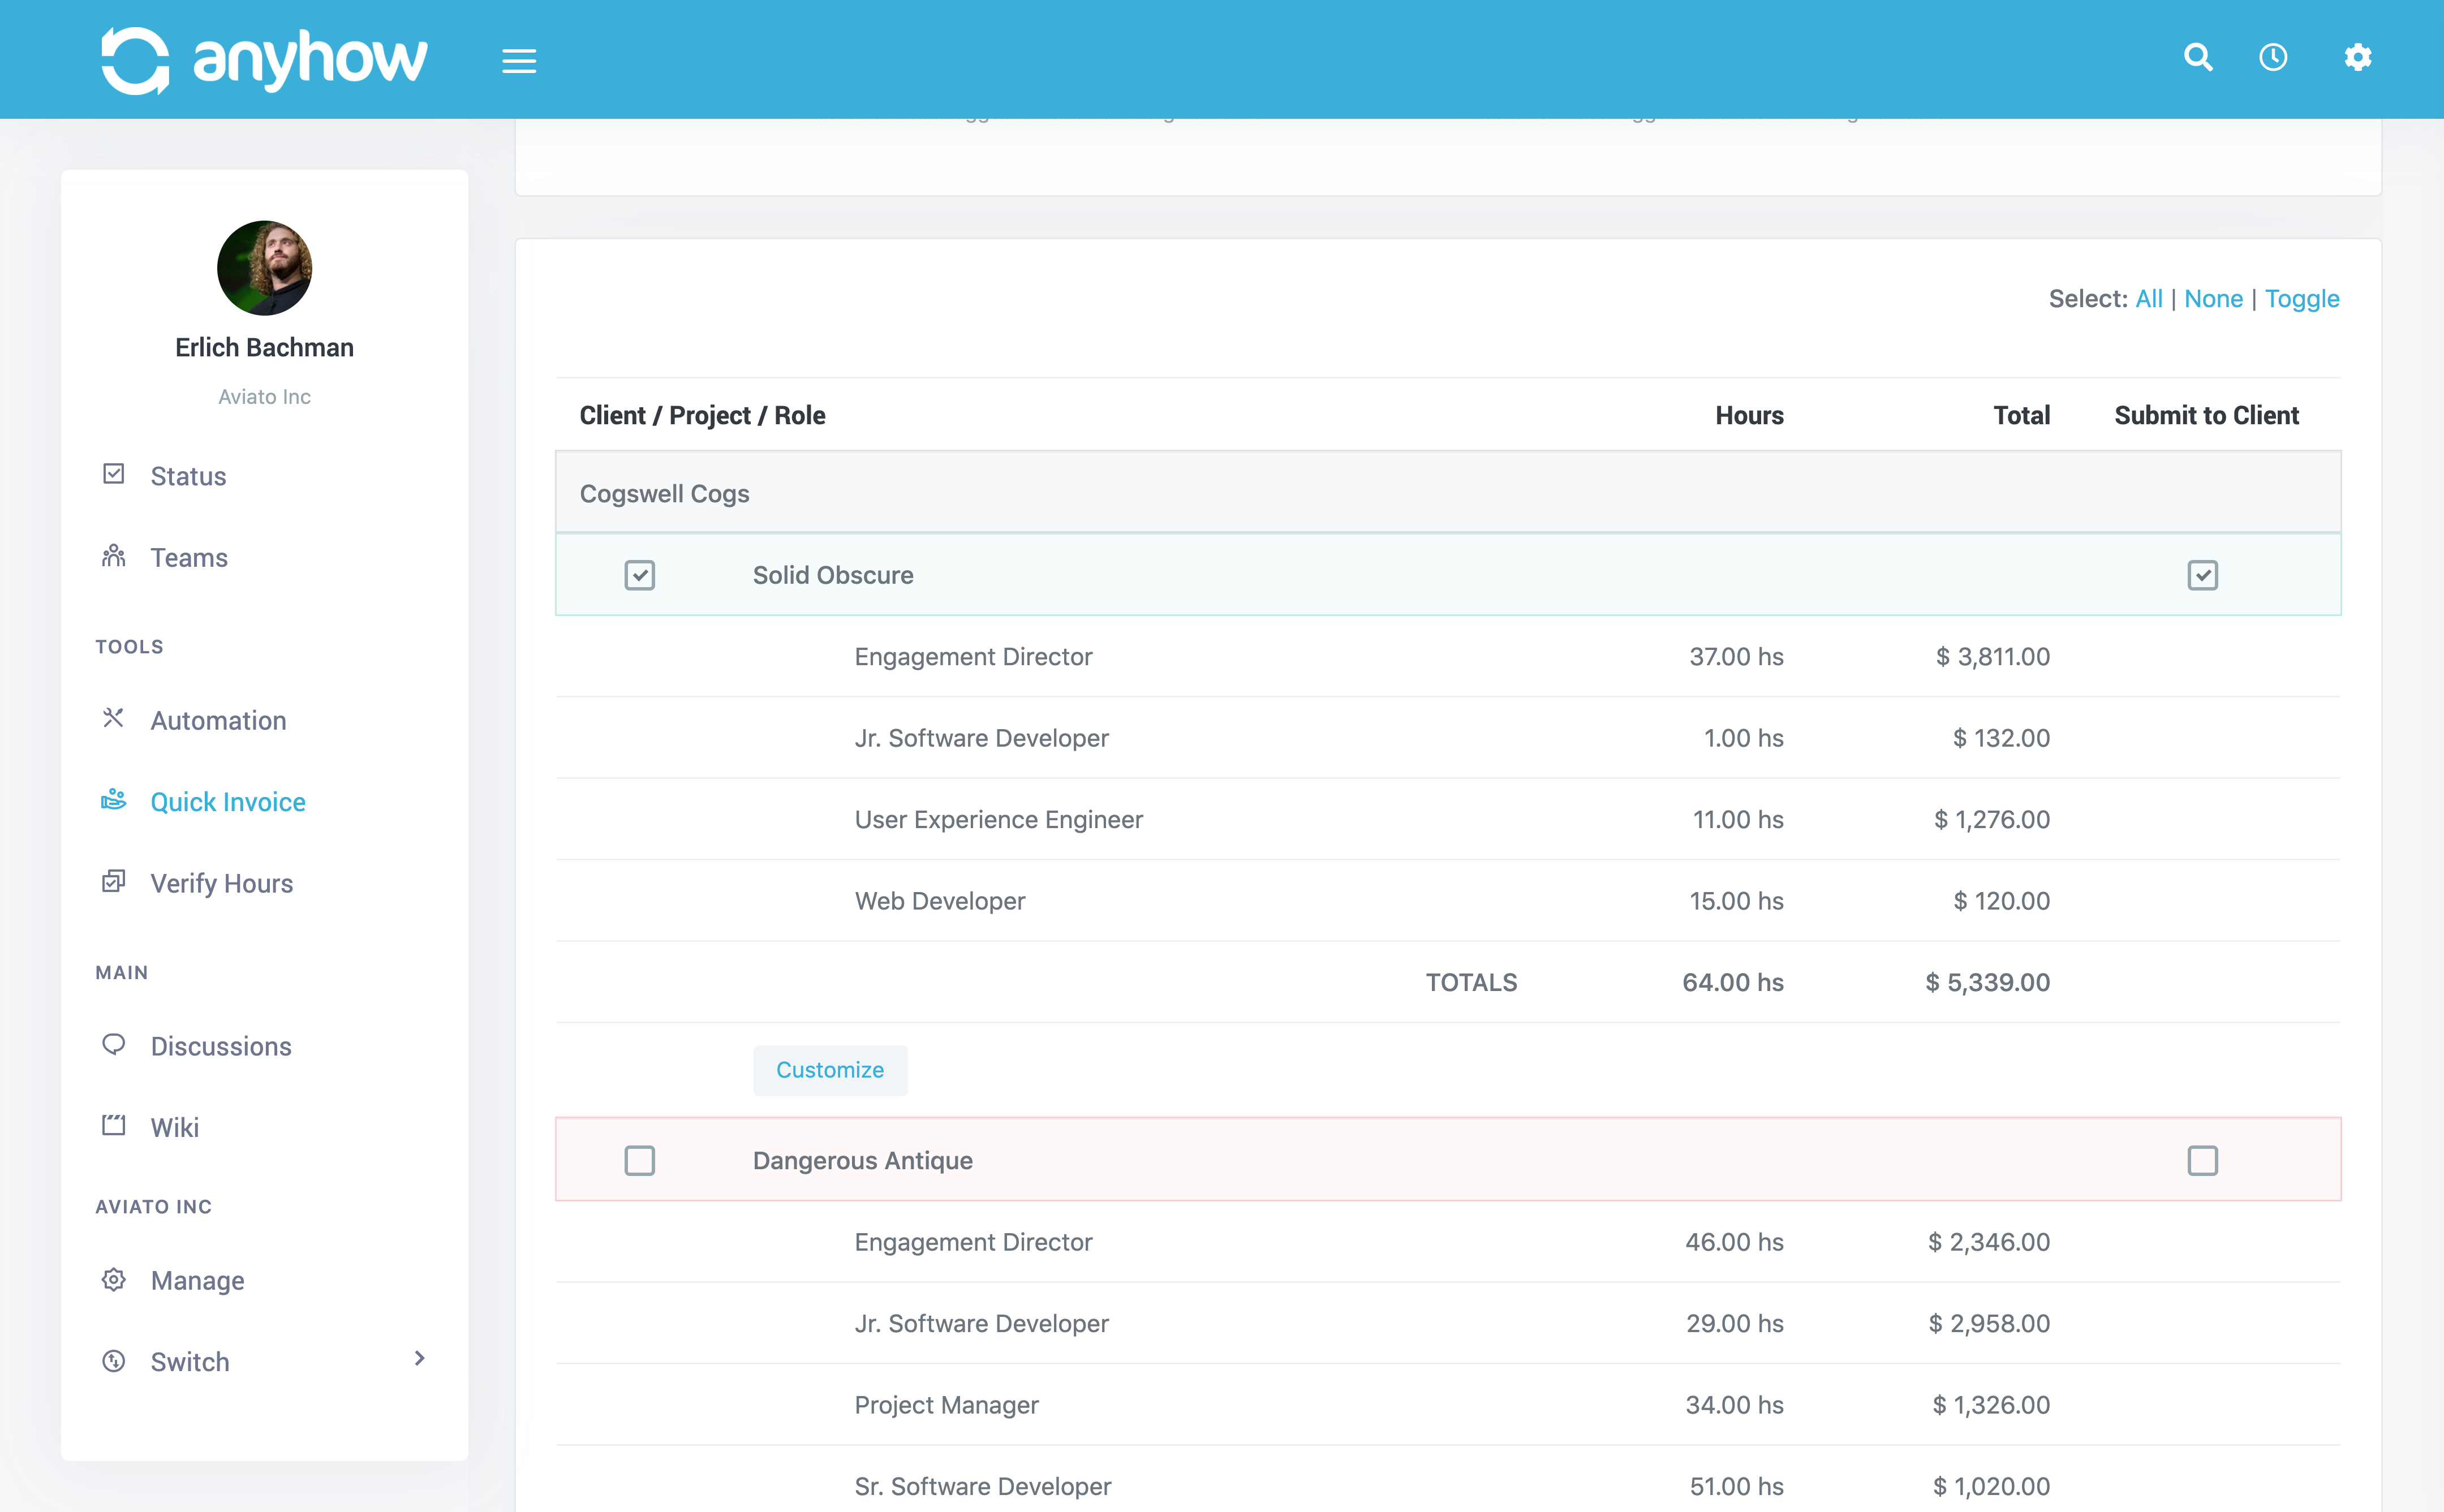
You will see all projects with time that can be invoiced listed. They will be grouped together by Clients and then Projects. Each project will have the roles with their time as individual line items.
Each project will have 2 checkboxes. One to the left of the project name and one to the right (under the Submit to Client heading.)
These are important and here's why.
- Create Invoice - If the check box on the left is selected, the project should be highlighted in green. This means that an invoice will be created. If you'd like to exclude a specific project, simply uncheck this option and the project will then be highlighted in red.
- Submit to Client - If this is checked, once saved and the invoice created, it will be submitted via email to the client. To customize the email(s) who are sent the invoice, please read on...
You can customize each individual invoice by clicking the Customize button for each project. Here you will find the following options:
- Invoice Number - Generally left blank and AnyHow will create it for you.
- Recipients - Email addresses of who should receive the invoice in their email inbox. This is usually set at the Project level but if you wish to alter it, you can do so here.
- Invoice Term - The term, in days, that should be used. IE, if your invoicing terms is usually NET 30, then enter 30 here.
- Submission Email Subject - You can customize your emails by altering the subject line here.
- Submission Email Body - You can customize your invoice email body (message) here.
The subject and body fields support a handful of template variables. They are:
{organization}- Your organization{client}- Client receiving the email{project}- Project being invoiced{invoice_number}- New invoice number{invoice_amount}- New invoice amount{invoice_url}- Web URL for invoice (if enabled.)

When all your projects are ready, simply click the Create Invoices button at the bottom and we'll handle the rest.
You will see success messages on the page once all processes are completed.
Manual Invoice From Logged Time
It is also possible to manually create an invoice from approved project time. The process is very simple but just requires a few more clicks. To manually create an invoice from time you simply:
- On the left menu, find "Managed Projects" and click it.
- In the new drop down, find the client you want and click it.
- In the new drop down, find the project you want and click it.
- This will take you to the project detail page.
- Now you click on the
View Timelogsaction
On this screen you can view all time logs for a given time period. Here are the steps to creating an invoice for logs that have not yet been invoiced.
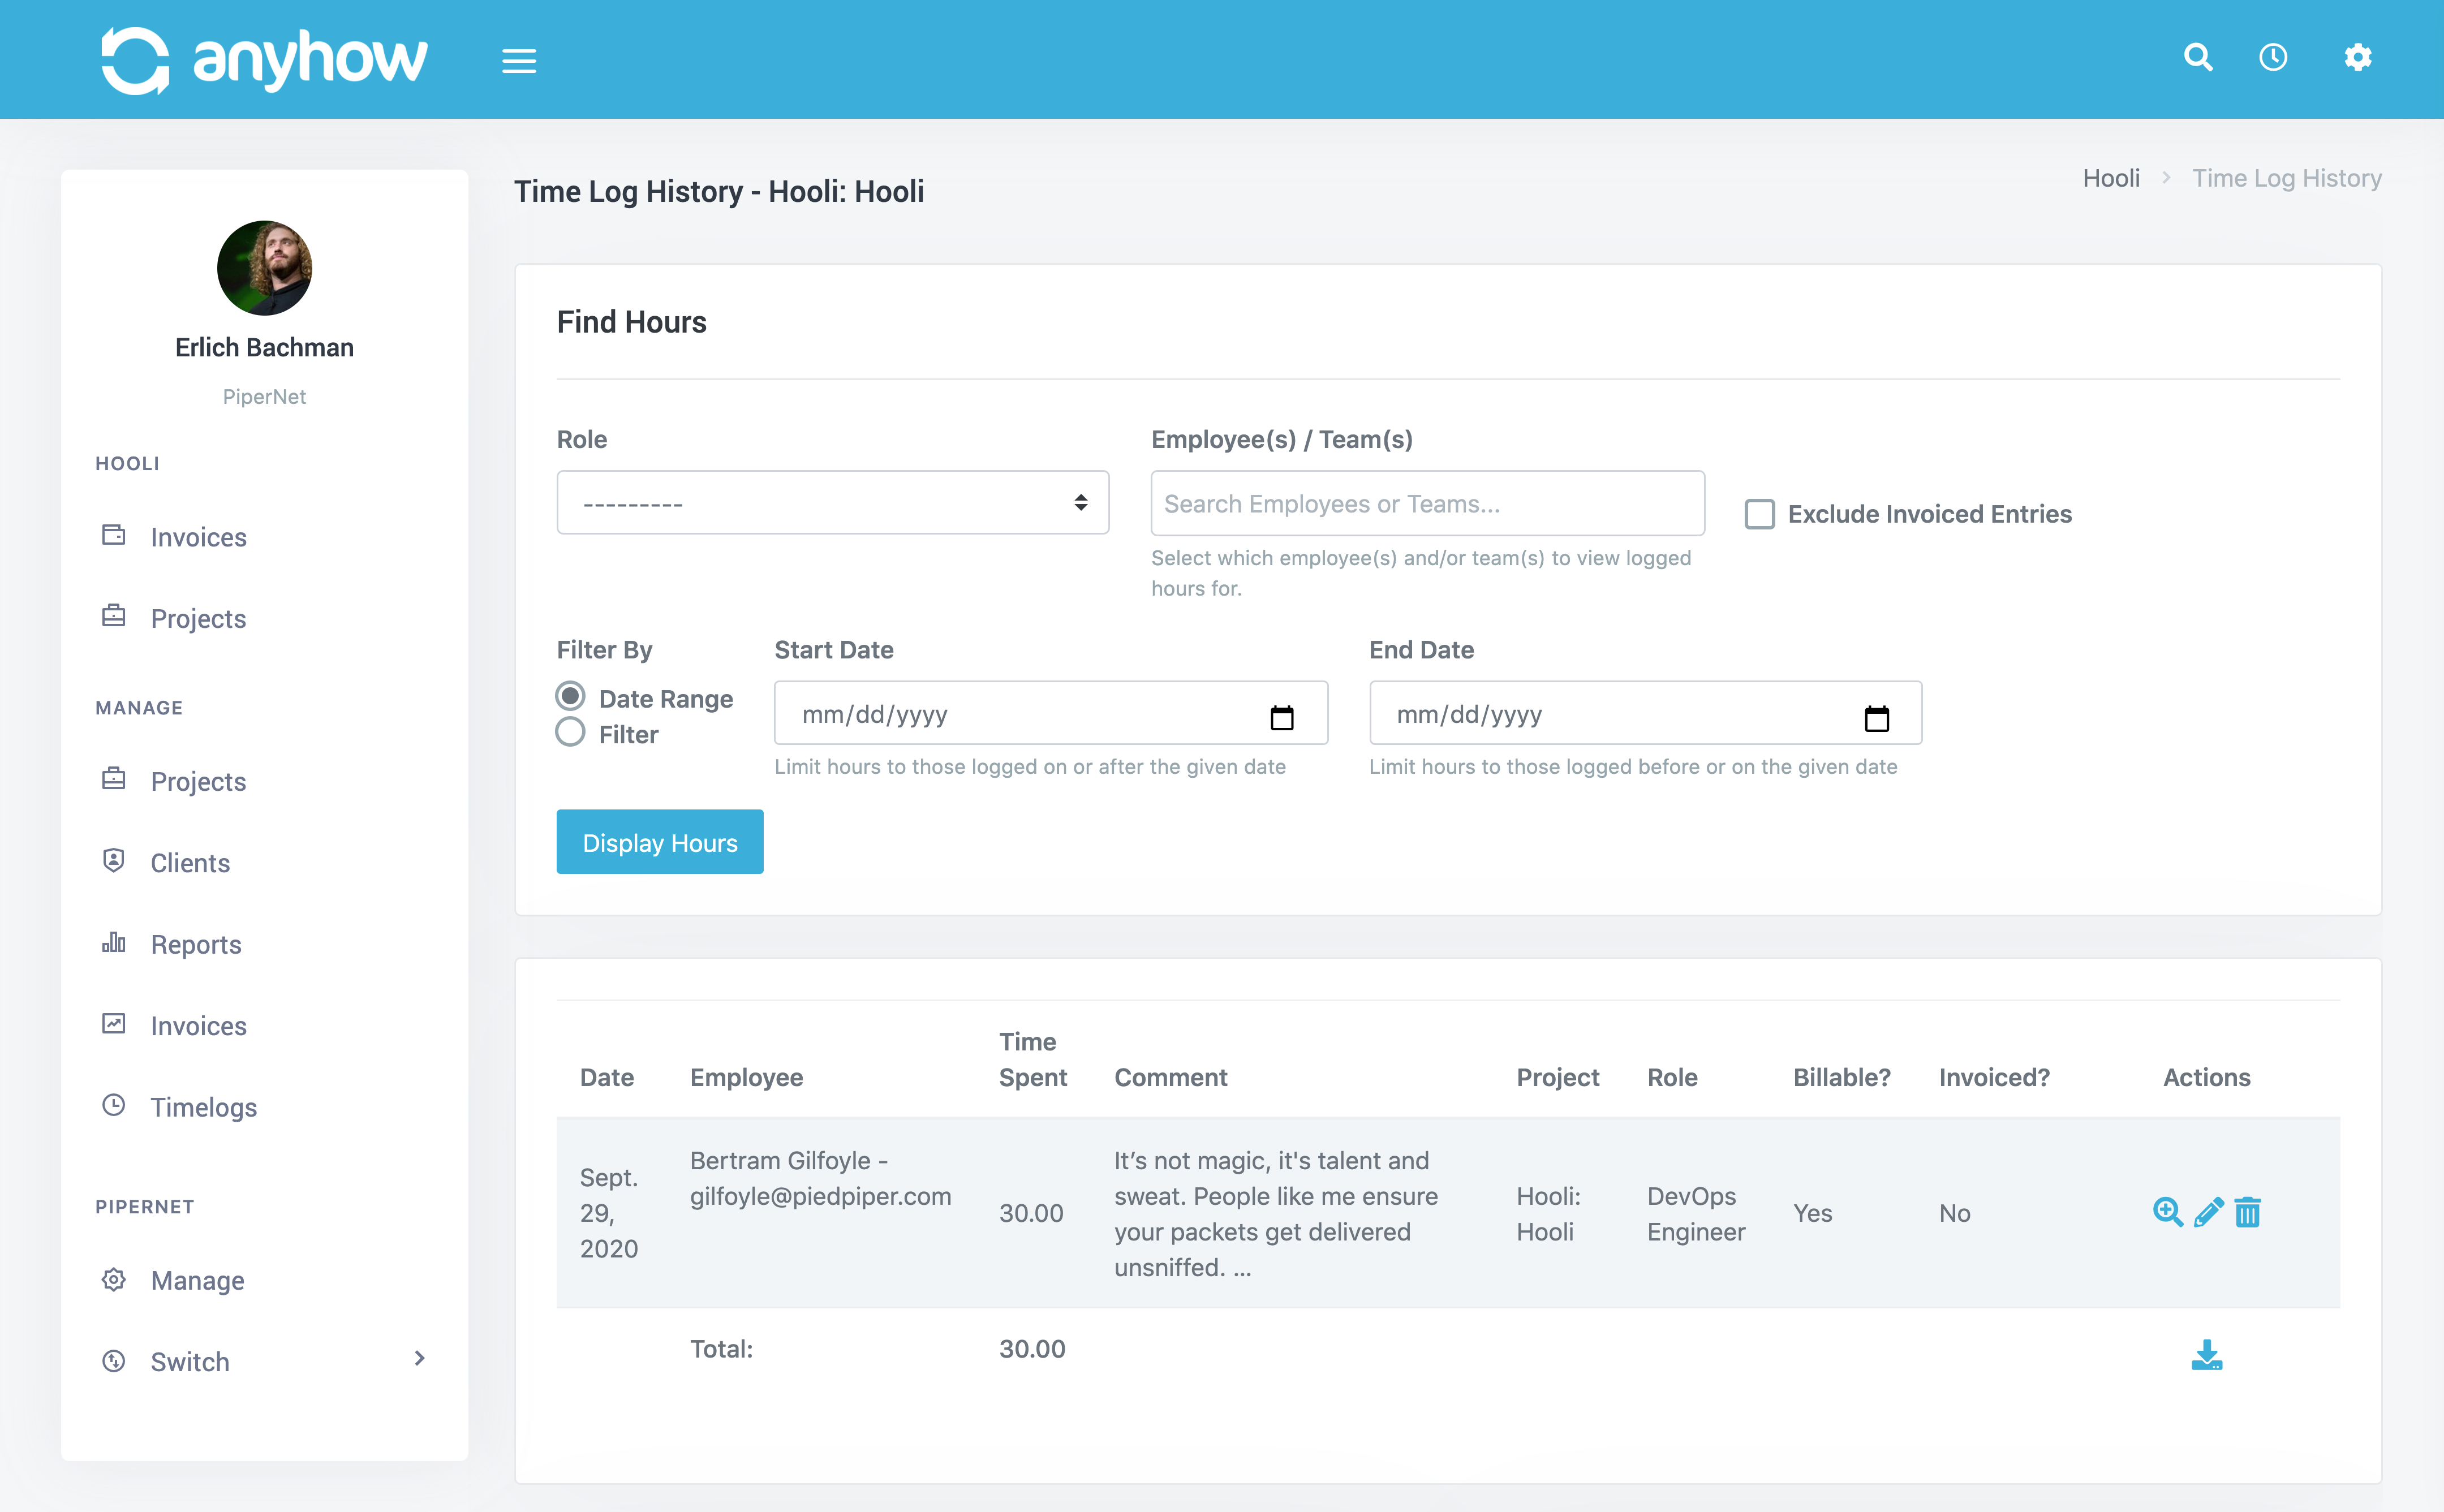
- Select the Role and/or Employee(s) you wish to filter for. Normally you leave these blank and filter for all time logs but you have the option to be more specific here should you want to.
- Select for the date range you wish.
- Select "Exclude Invoices Entries"
- Click
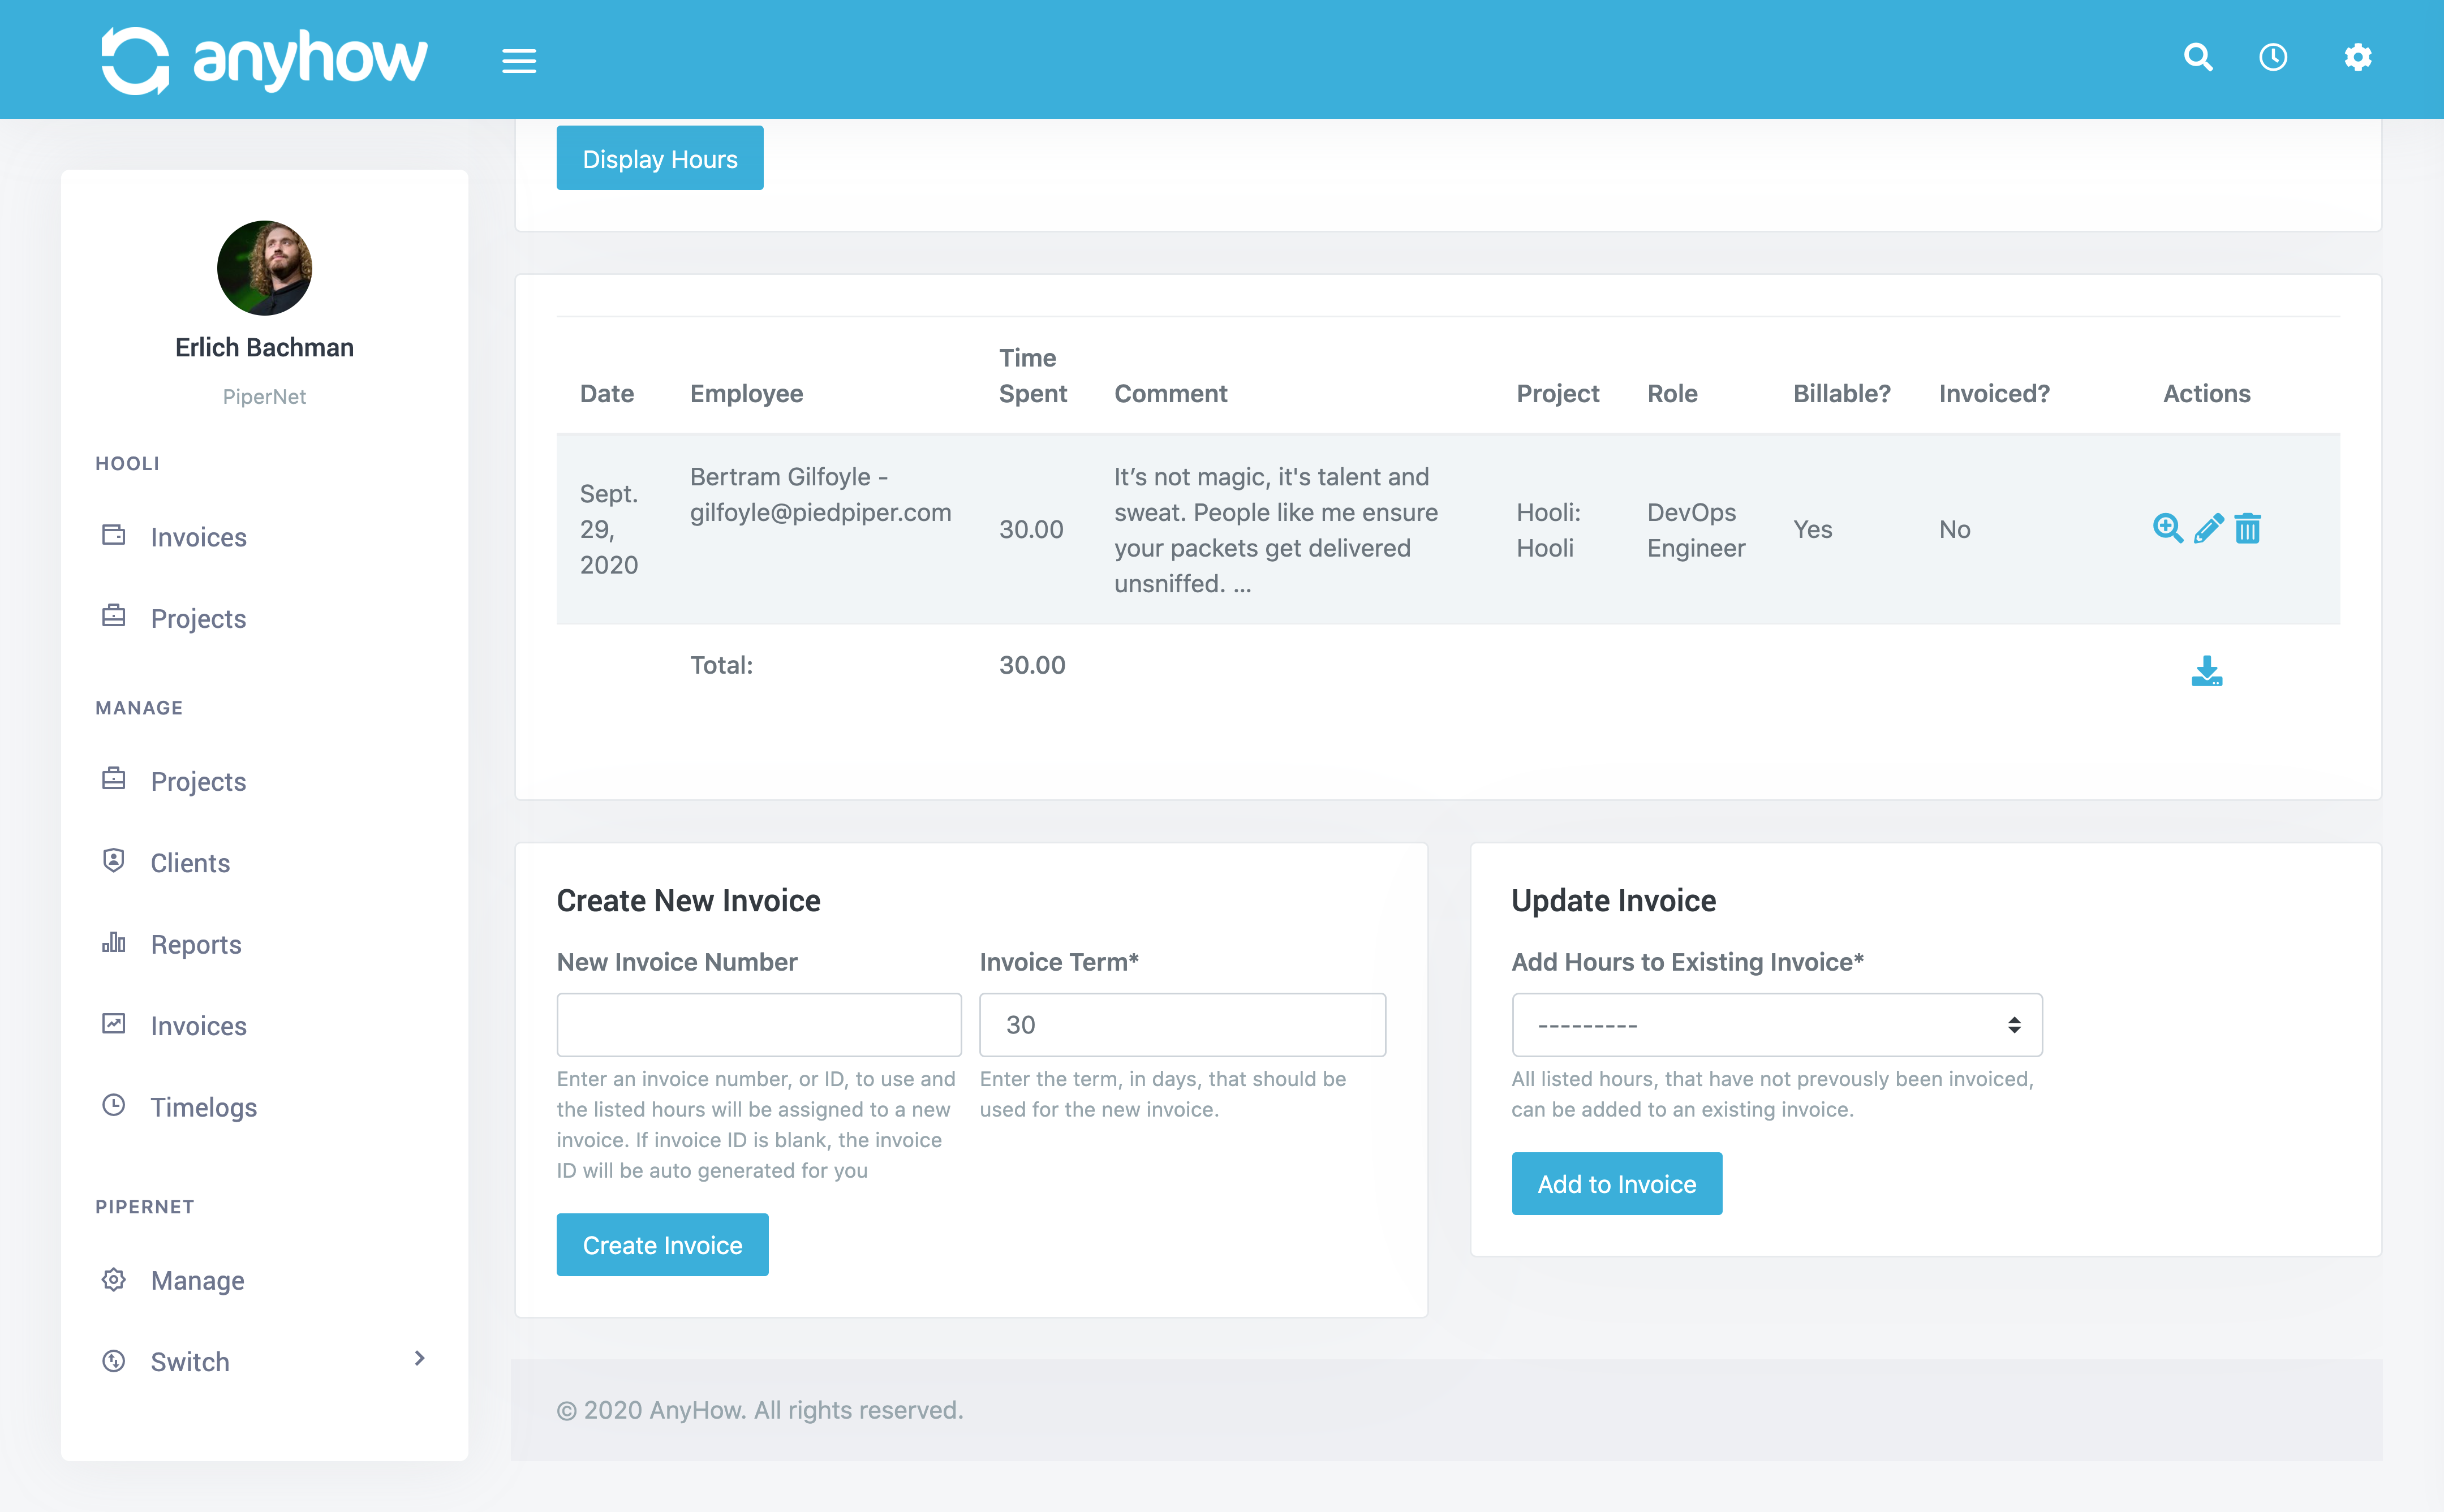
Display Hours - Scroll to the bottom to the "Create New Invoice" section.
- Enter the invoice number or leave it blank
- Enter invoice term, in days, that should be used. IE, if your invoicing terms is usually NET 30, then enter 30 here.
- Click the
Create Invoicebutton. - You will see a success message with the new invoice number.
- Click the invoice number if you want to view the invoice itself.
Your new invoice is now created. You can manage it from the Organization invoices screen or the Project invoices screen.
Manually Create An Empty Invoice
Sometimes you have the need to create an invoice from scratch that is empty and allows you to customize it with specific details you want to add. To create an empty invoice you need to do the following:
- On the left menu, find "Managed Projects" and click it.
- In the new drop down, find the client you want and click it.
- In the new drop down, find the project you want and click it.
- This will take you to the project detail page.
- Click the
Invoicesaction.
At the top of the Project Invoices screen you can create an empty invoice.
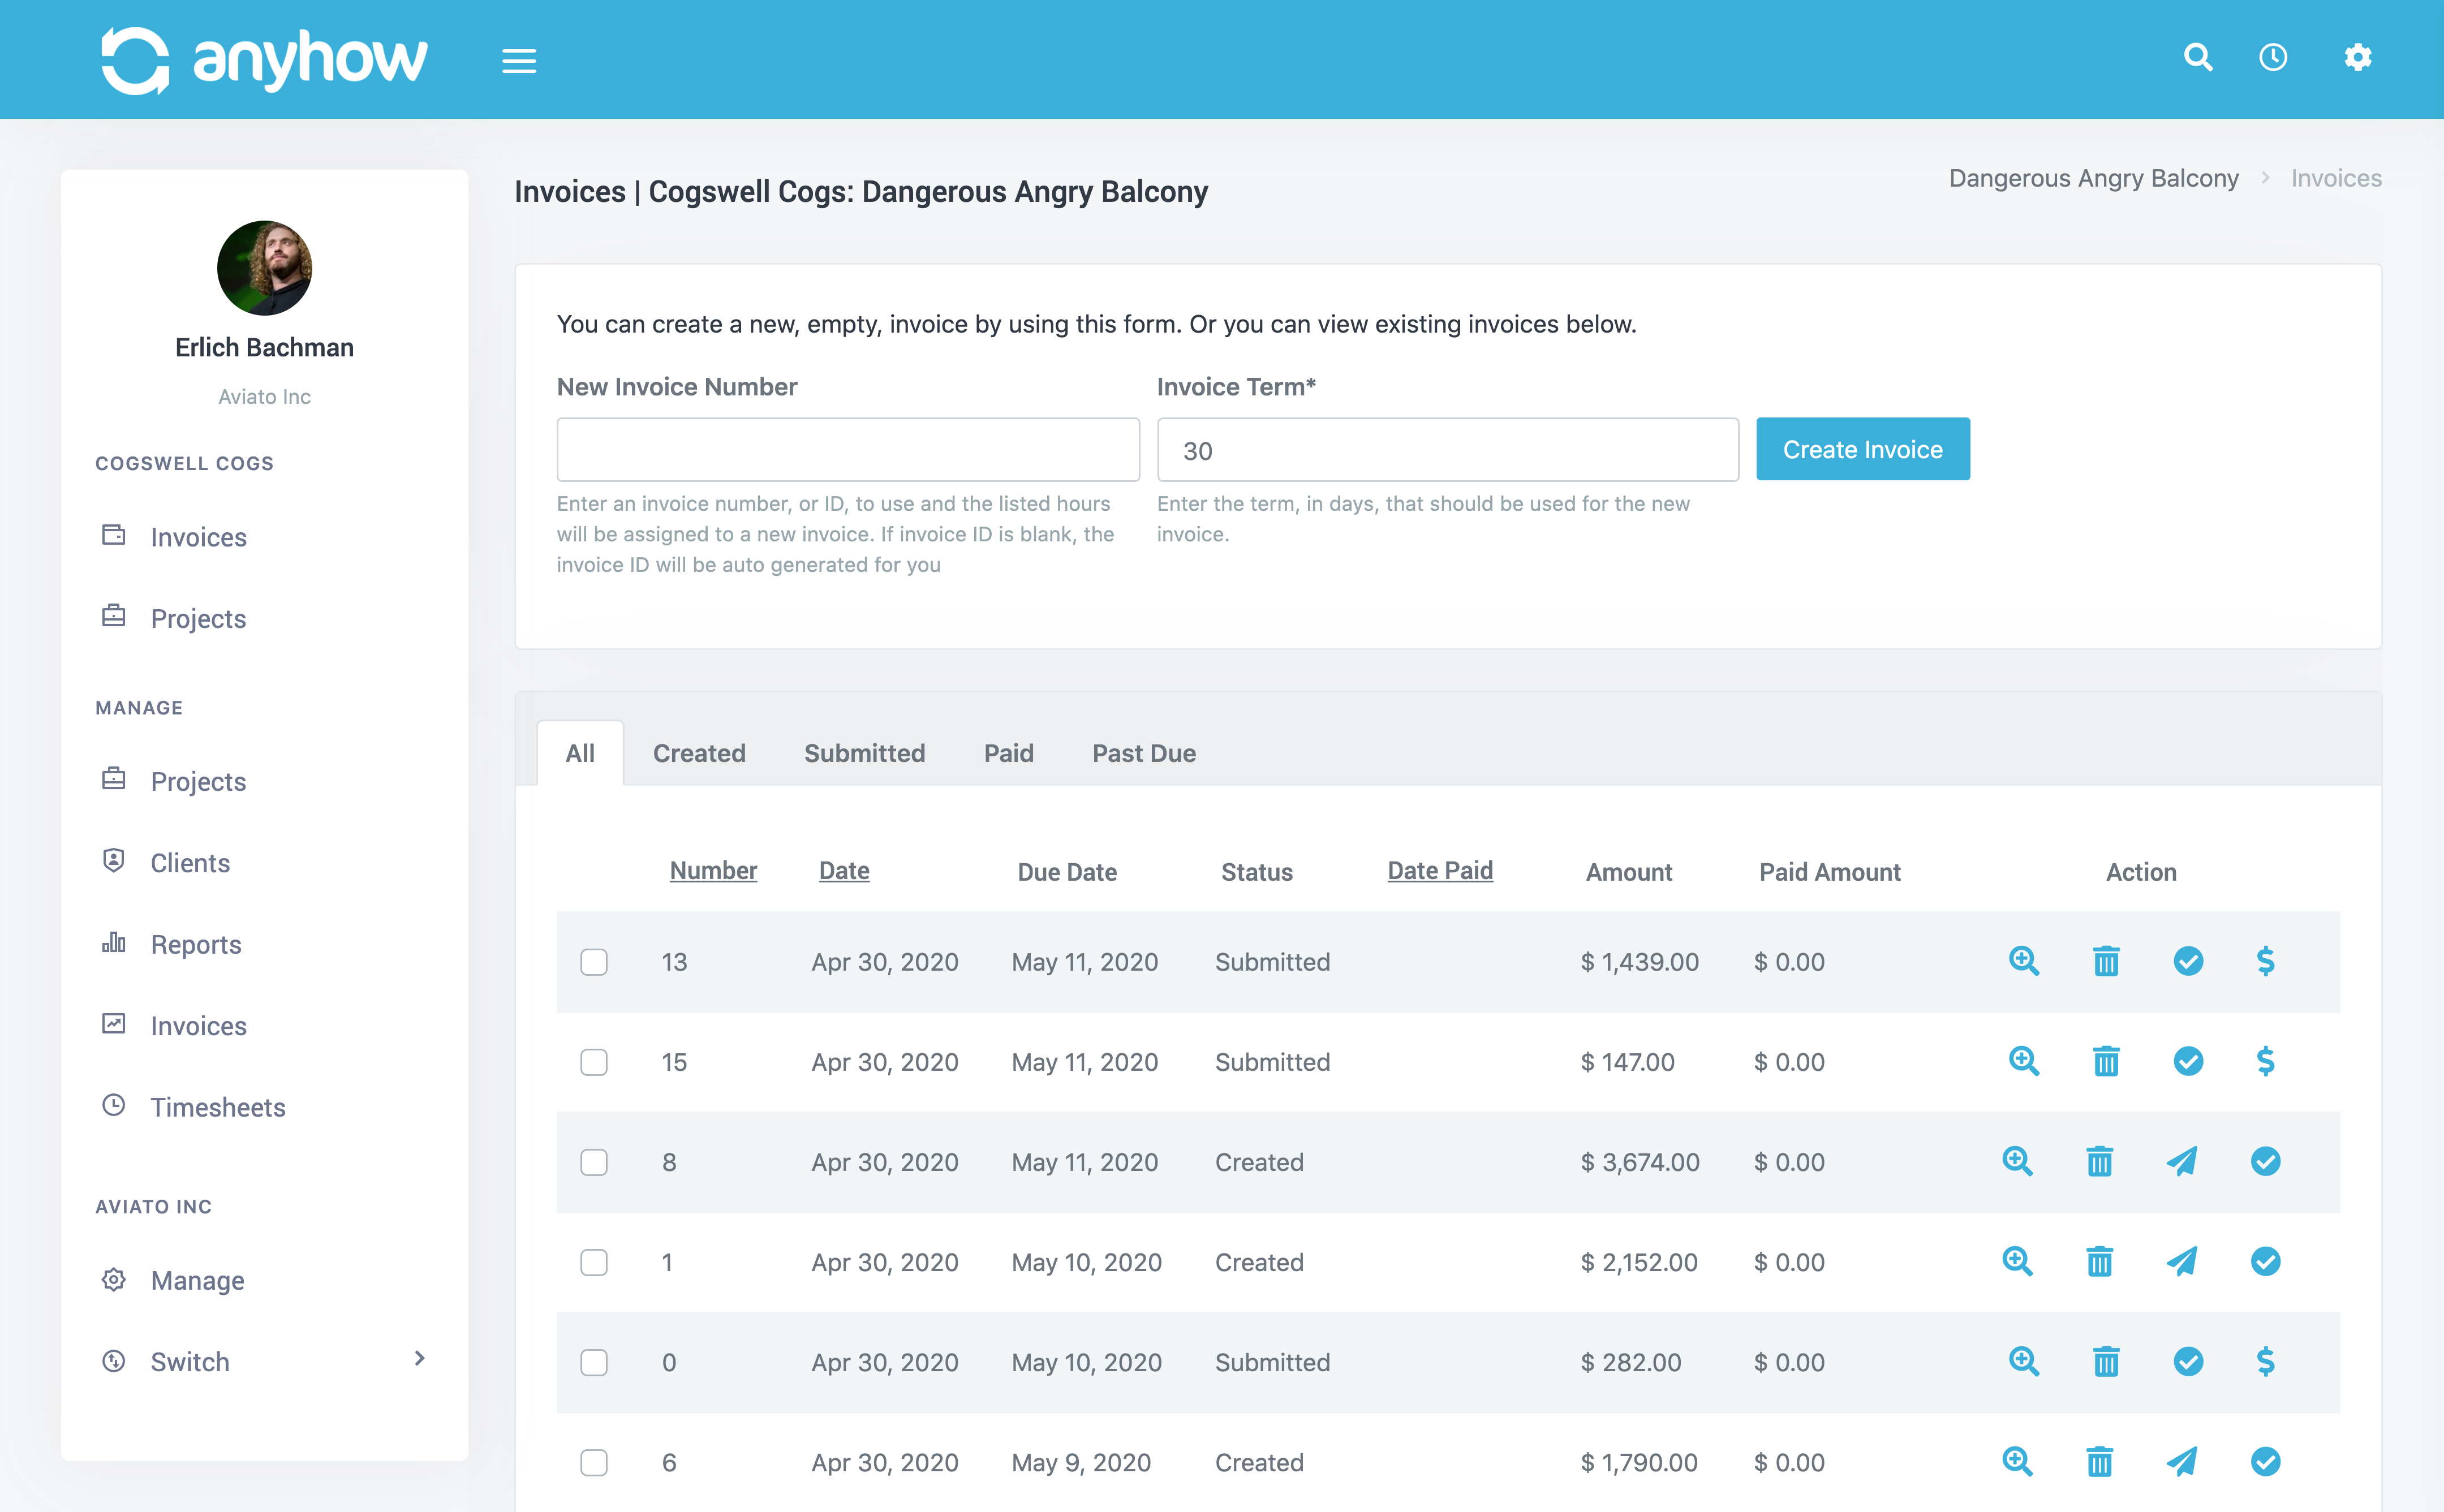
To create an empty invoice simply do the following:
- Enter the invoice number or leave it blank
- Enter invoice term, in days, that should be used. IE, if your invoicing terms is usually NET 30, then enter 30 here.
- Click the
Create Invoicebutton. - You will see a success message with the new invoice number.
- Click the invoice number if you want to view the invoice itself. Generally you want to do this right away so you don't forget. An empty invoice is pretty useless after all :)
- Once clicked through you can edit the details of the invoice
That's it. Very simple to create an empty invoice.